Dkubex Workspace User Guide
Dkubex Workspace is your personal, on-demand development environment in the cloud. Instead of setting up tools locally or sharing a shared server, you get an isolated workspace running in the cluster — with JupyterLab, VS Code, a terminal, and more pre-installed. Spin one up in seconds, share it with a teammate, and tear it down when you’re done.
Logging In
Dkubex Workspace uses your organization’s single sign-on (SSO). Navigate to the app URL and you are logged in automatically with your existing credentials — no separate account or password needed.
Home Dashboard
After logging in, the Home page is your central hub. It shows two sections:
Your Workspaces — workspaces you own
Shared with You — workspaces others have shared with you
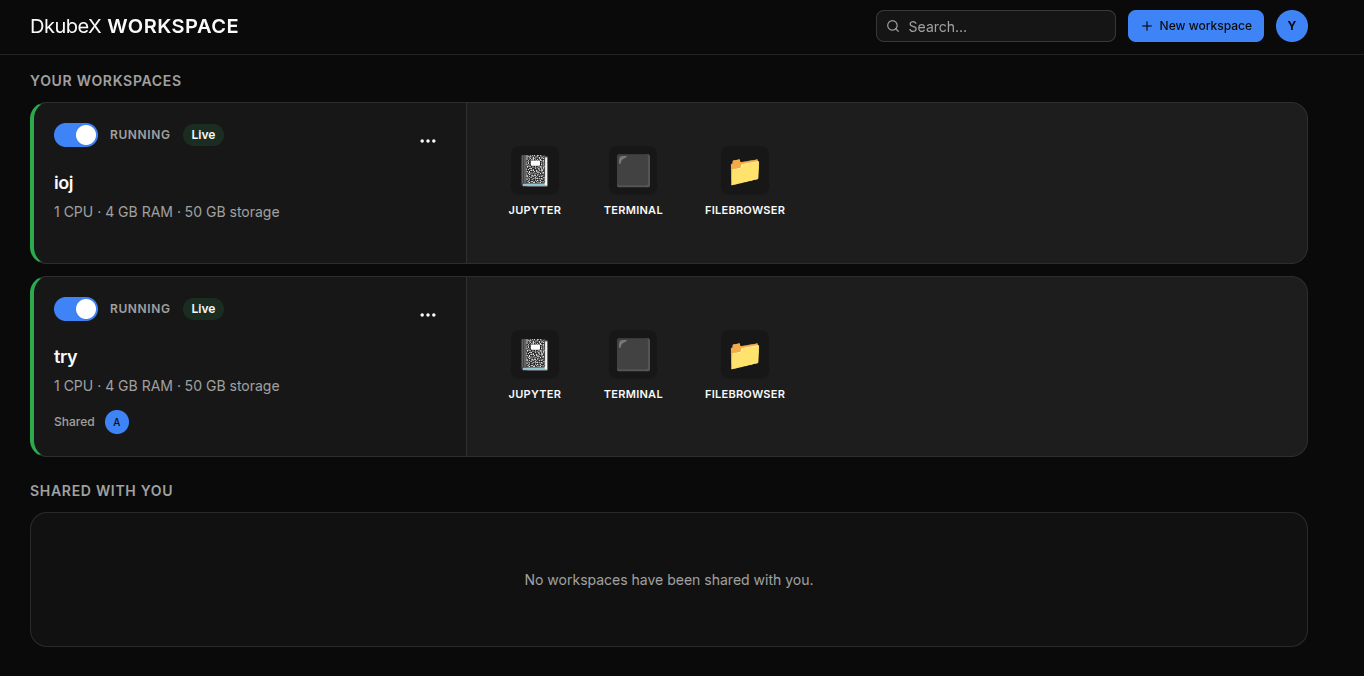
Each workspace card shows its name, current status, resource configuration, and quick-action buttons. Use the search bar at the top to filter by name, description, or owner.
Creating a Workspace
The new workspace wizard walks you through four steps:
Step 1 — Details: Click New Workspace (or + New workspace) on the Home page, then enter a name for your workspace.
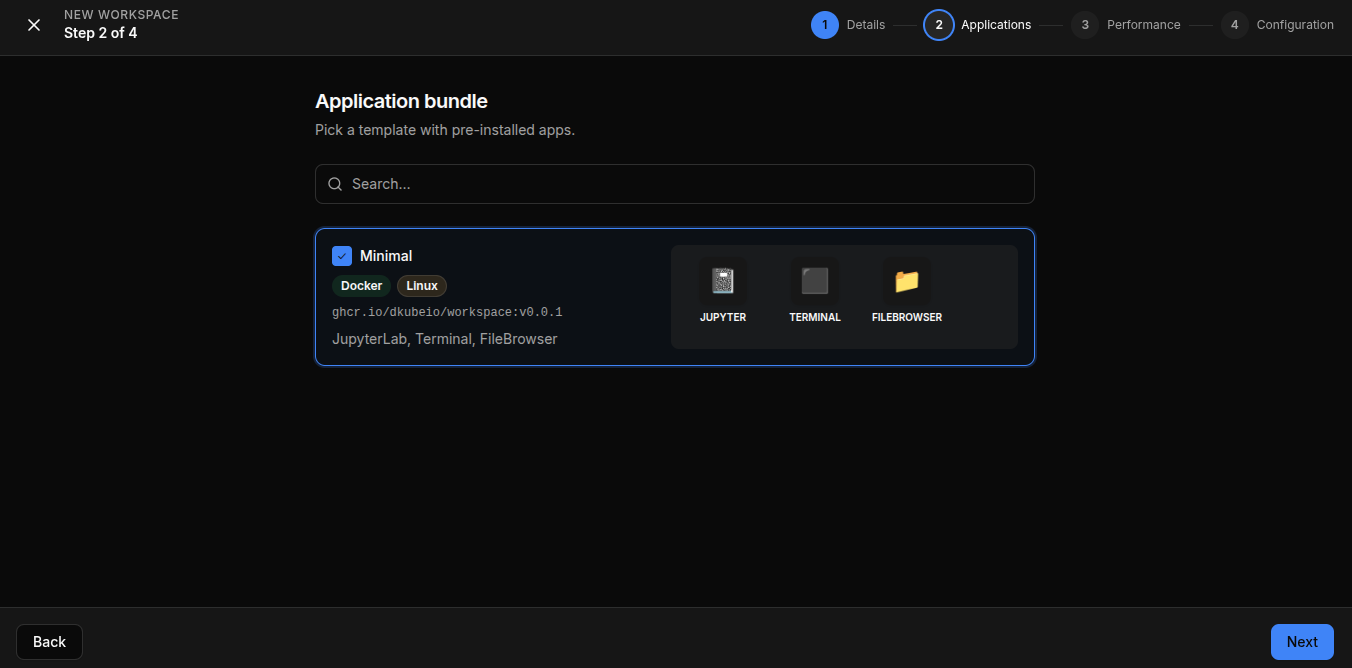
Step 2 — Applications: Pick an application bundle — a template that determines which apps come pre-installed (e.g., the Minimal bundle includes JupyterLab, Terminal, and FileBrowser).
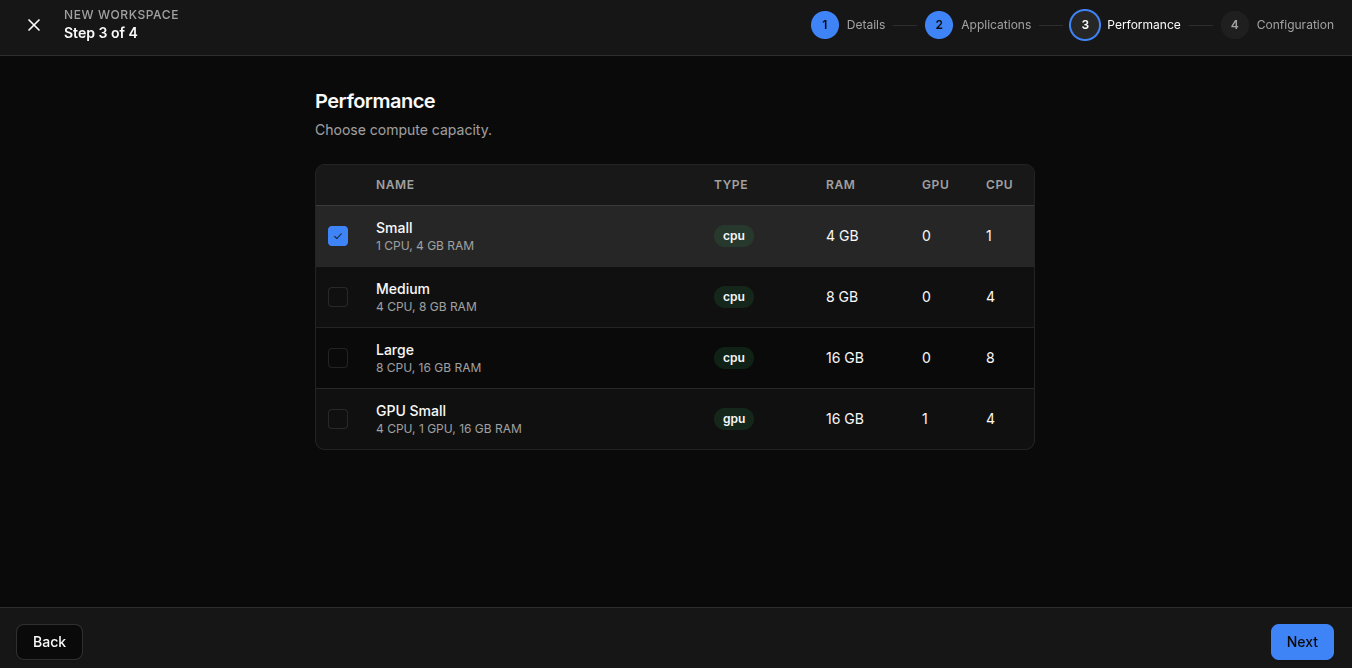
Step 3 — Performance: Choose a compute profile that sets the CPU, GPU, and RAM allocated to your workspace.
Profile |
CPU |
RAM |
GPU |
|---|---|---|---|
Small |
1 |
4 GB |
0 |
Medium |
4 |
8 GB |
0 |
Large |
8 |
16 GB |
0 |
GPU Small |
4 |
16 GB |
1 |
Step 4 — Configuration: Review and confirm any final settings, then click Create.
The workspace card will appear on the Home page with a Creating status. Once the pod is ready, the status changes to Running.
Tip: Start with a smaller compute profile and scale up later — you can edit resource settings without losing your data.
Workspace Statuses
Status |
What it means |
|---|---|
Creating |
The workspace pod is being provisioned |
Running |
The workspace is active and apps are accessible |
Stopped |
The pod is shut down; your data is preserved |
Archived |
The workspace is soft-deleted; pod is stopped but data is retained |
Error |
Something went wrong; check logs for details |
Managing Your Workspace
Each workspace card has an actions menu (⋮) with the following options:
Start / Stop / Restart
Start — wakes a stopped workspace; the pod starts and your previous session is restored.
Stop — shuts down the pod cleanly; data on the persistent volume is preserved.
Restart — stops and immediately restarts the pod; useful when an app becomes unresponsive.
Edit
Click Edit (pencil icon) to change the workspace’s compute resources (CPU, GPU, memory, storage). Changes take effect on the next start.
Logs
Click the Logs button to view live logs from the workspace pod — useful for diagnosing startup failures or app errors.
Archive
Archiving is a soft-delete: the workspace pod is stopped and the workspace is moved off your main dashboard. Your data is preserved on the persistent volume.
Open the actions menu → Archive.
Confirm the action.
To view archived workspaces, use the Archived tab on the Home page.
Restore
To bring an archived workspace back:
Go to the Archived tab.
Find the workspace and click Restore.
The workspace returns to the Stopped status and can be started normally.
Delete
Permanently removes the workspace and all its data. This action cannot be undone.
Open the actions menu → Delete.
Type the workspace name to confirm.
Click Delete.
Warning: Deleting a workspace destroys its persistent volume. Archive it instead if you might need the data later.
Using Apps
Each workspace can run multiple development tools, called apps, side by side.
Available Apps
App |
What it is |
|---|---|
JupyterLab |
Interactive notebook environment for Python, R, and more |
Terminal |
Browser-based command-line terminal |
FileBrowser |
Graphical file manager for your workspace files |
Launching an App
Open your workspace card and click Add App (or the + button).
Select the app you want to launch.
Click on Launch.
The app starts inside the workspace pod and an access link appears on the workspace card. Click the link to open it in a new tab.
Stopping an App
Click the Stop button next to an app’s link on the workspace card. The app process inside the pod is stopped; other apps continue running.
Note: Apps open in your browser over a secure, authenticated route — you do not need to manage ports or SSH tunnels.
Workspace Files
Every workspace has a persistent volume mounted at /home/workspace. Files saved here survive pod restarts and stops. Use the FileBrowser app or the Terminal to manage files.
To transfer files from your laptop:
Use the FileBrowser app’s upload button.
Use
scporrsyncfrom the Terminal (if SSH is configured by your admin).
Quick Reference
Action |
How to do it |
|---|---|
Create a workspace |
Home → New Workspace |
Start a workspace |
Workspace card → Start |
Stop a workspace |
Actions menu (⋮) → Stop |
Restart a workspace |
Actions menu → Restart |
Open an app |
Workspace card → app link or Add App |
Edit compute resources |
Actions menu → Edit |
View logs |
Actions menu → Logs |
Share with a teammate |
Actions menu → Share |
Archive (soft-delete) |
Actions menu → Archive |
Restore archived workspace |
Archived tab → Restore |
Permanently delete |
Actions menu → Delete (irreversible) |
Getting Help
If your workspace is stuck in Creating or Error state for more than a few minutes, click Logs to see what went wrong and share the output with your platform administrator.